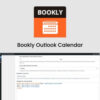
Bookly Outlook Calendar 3.9
Recently Updated
100% Original Product & Well Documented
♥ Loved by Many!
0 sales
Version 3.9

GPL License
Original price was: $64.00.$3.99Current price is: $3.99.
- Verified from VirusTotal
- 100% Original Product and Virus Free.
- Free New Version Lifetime On Single Purchase.
- Unlimited Website Usage
- Price is in US dollars and included tax
Sale will end soon

SSL Secured Checkout

Verified From
![]()
![]()
- Products Are Purchased and Downloaded From Original Authors.
- The File is 100% Completely Untouched and Unmodified.
- Last Update: 20.Jan.2026
- Version: 3.9

Premium Membership
Download this product for FREE and also gain access to 5,000+ premium themes and plugins.

Secure Transaction
Your transaction is secure with the Stripe. One of the famous payment gateway
Virus Free
Our all items on our website are Virus free and tested with "McAfee Secure"
Timely Update
After publishing the new update from author we upload the latest file on our website
Product Description and Reviews
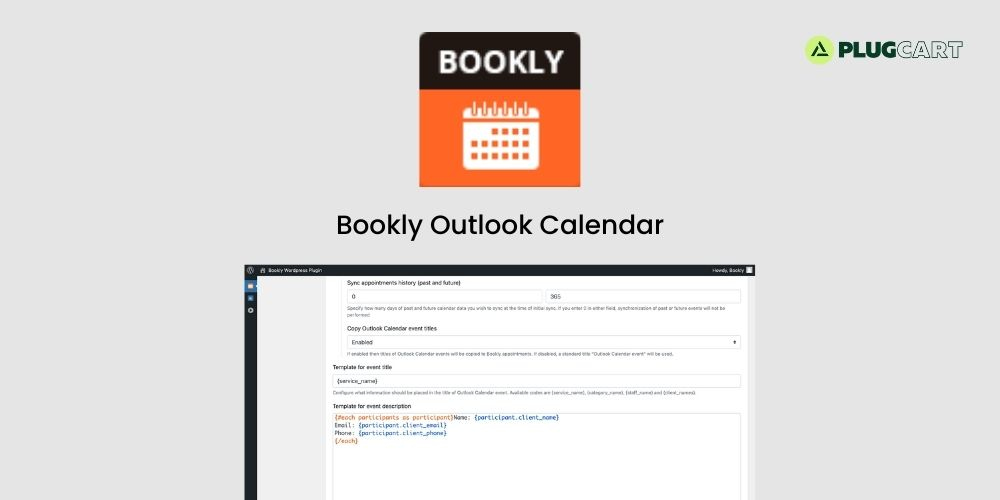
Bookly Outlook Calendar Latest Version
This is a GPL-distributed version. No official support. Clean, secure, and legally redistributed under the GPL license.
Bookly Outlook Calendar (Add-on) enables seamless real-time synchronization between your Bookly Calendar and Outlook Calendar. This integration ensures that all your calendar data remains up-to-date, helping you stay organized, avoid scheduling conflicts, and never miss important appointments.
Setup and configuration – Bookly Outlook Calendar
1. Purchase, download, install and activate the Bookly Outlook Calendar (Add-on) in Plugins.
2. Read carefully and follow the instructions in Settings > Outlook Calendar (admin area of your Bookly) to set up the connection between two calendars.
Important: Your website must use HTTPS. The Outlook Calendar API requires a valid SSL certificate installed on your web server for proper functionality.
To find your Application ID and Application Secret, do the following:
1. Sign in to the Azure portal using either a work or school account or a personal Microsoft account.
2. If your account gives you access to more than one tenant, select your account in the top right corner, and set your portal session to the Azure AD tenant that you want.
3. Select Microsoft Entra ID. Then click + Add > App registration.
4. When the Register an application page appears, enter your application’s Name and Redirect URI found in Bookly menu > Settings > Outlook Calendar. Under the Redirect URI, in Select a platform field, choose Web. Make sure that the Supported account types is set to Accounts in any organizational directory (Any Microsoft Entra ID tenant – Multitenant) and personal Microsoft accounts (e.g. Skype, Xbox). When finished, click Register.
5. Azure AD assigns a unique application (client) ID to your app, and you’re taken to the Home page. Find your application in App registrations > All applications, and select it.
6. Copy the Application (client) ID. Use it in the Application ID field in Bookly settings.
7. Under Certificates & secrets, choose New client secret, set Expires to 24 months, add description and click Add. Insert the secret into the Application secret field in Bookly.
8. Under API permissions, choose Add a permission, and select Microsoft Graph > Delegated permissions. In Select permissions find Calendars.ReadWrite, select it and click Add permissions button.
9. Save the changes.
3. Go to the Staff Members section, select a staff member, click Edit > Advanced. Click Sign in with Microsoft.
4. In Settings > Outlook Calendar, choose a mode of synchronization according to your preference and needs.
One-way sync – all new appointments created in Bookly Calendar and any further changes will appear in Outlook Calendar.
Two-way front-end only – all updates made within Bookly will automatically sync to your Outlook Calendar. Events initially created in Outlook Calendar will not be mirrored in Bookly Calendar. Bookly will consider time slots occupied by Outlook Calendar events as unavailable for booking.
Two-way sync – all new bookings created or updated in Bookly Calendar will be automatically reflected in the Outlook Calendar, and vice versa.
5. If you’ve chosen the Two-way sync mode, you can specify the number of past days’ calendar data you want to sync in the Sync appointments history field. For instance, entering ‘1’ will sync appointments starting from yesterday.
6. The Limit number of fetched events option allows you to restrict the number of events fetched. This prevents memory issues in PHP that may arise when Bookly attempts to retrieve a large number of events from the Outlook calendar.
7. Bookly allows you to set up the way your booking information will be displayed in Outlook Calendar.
For the event title template, select the details you want to include for the Outlook Calendar event description generated by Bookly. You can use the following codes: {service_name}, {category_name}, {staff_name}, and {client_names}.
In the event description template, use codes for appointment-related information that you want to display in the Outlook Calendar.
Manual synchronization – Bookly Outlook Calendar GPL
To manually synchronize your calendars, click on the Outlook Calendar button located at the top right corner of the Bookly Calendar interface.
Add a review
Currently, we are not accepting new reviews
Top Selling
Version 4.0.0

Original price was: $400.00.$3.99Current price is: $3.99.
2208 sales
Version 27.2

Original price was: $99.00.$3.99Current price is: $3.99.
818 sales
Version 3.21.0.1

Original price was: $249.00.$3.99Current price is: $3.99.
568 sales
Version 3.0.109
Original price was: $129.00.$3.99Current price is: $3.99.
531 sales
Version 8.4.1
Original price was: $59.00.$3.99Current price is: $3.99.
473 sales
Version 4.12.4

Original price was: $59.00.$3.99Current price is: $3.99.
370 sales
Version 12.7.5

Original price was: $59.00.$3.99Current price is: $3.99.
248 sales
Version 8.1.4
Original price was: $99.00.$3.99Current price is: $3.99.
245 sales
Related products
Version 12.7.5
Original price was: $59.00.$3.99Current price is: $3.99.
248 sales
Version 4.0.0
Original price was: $400.00.$3.99Current price is: $3.99.
2208 sales
Version 2.2.3
Original price was: $49.00.$3.99Current price is: $3.99.
68 sales
Version 4.37.0
Original price was: $69.00.$3.99Current price is: $3.99.
10 sales
Version 1.3.8
Original price was: $49.00.$3.99Current price is: $3.99.
0 sales
Version 1.5.10

Original price was: $22.00.$3.99Current price is: $3.99.
6 sales
Version 2.5.14
Original price was: $59.00.$3.99Current price is: $3.99.
6 sales
Version 4.5.1

Original price was: $49.00.$3.99Current price is: $3.99.
13 sales
Version 12.4.1.2
Original price was: $160.00.$3.99Current price is: $3.99.
59 sales
Version 3.5.16.1
Original price was: $22.00.$3.99Current price is: $3.99.
15 sales
Version 3.20.5

Original price was: $59.00.$3.99Current price is: $3.99.
207 sales
Version 28.3.3

Original price was: $59.00.$3.99Current price is: $3.99.
116 sales
Version 2.3.2

Original price was: $22.00.$3.99Current price is: $3.99.
21 sales
Version 27.2
Original price was: $99.00.$3.99Current price is: $3.99.
818 sales
Version 2.0.21.1
Original price was: $22.00.$3.99Current price is: $3.99.
6 sales
Version 3.7.5
Original price was: $20.00.$3.99Current price is: $3.99.
49 sales
Version 7.15.1
Original price was: $69.00.$3.99Current price is: $3.99.
155 sales
Version 3.6.9
Original price was: $59.00.$3.99Current price is: $3.99.
131 sales
Version 2.29.0
Original price was: $89.00.$3.99Current price is: $3.99.
15 sales
Version 2.12.0
Original price was: $59.00.$3.99Current price is: $3.99.
2 sales
Version 1.12.14
Original price was: $199.00.$3.99Current price is: $3.99.
27 sales
Version 4.12.4
Original price was: $59.00.$3.99Current price is: $3.99.
370 sales
Version 2.12.17
Original price was: $57.00.$3.99Current price is: $3.99.
4 sales
Version 2.3.1.1

Original price was: $39.00.$3.99Current price is: $3.99.
5 sales
Sorry, no reviews match your current selections
WINTER SALE OFFERS • GET 25% OFF ON 1 YEAR & LIFETIME MEMBERSHIP USE COUPON CODE: SPECIALDISCOUNT25 • BUY TWO GPL PRODUCTS AT JUST $6 USE COUPON CODE: BUY2 • GET 25% OFF ON 1 YEAR & LIFETIME MEMBERSHIP USE COUPON CODE: SPECIALDISCOUNT25 • BUY TWO GPL PRODUCTS AT JUST $6 USE COUPON CODE: BUY2 • GET 25% OFF ON 1 YEAR & LIFETIME MEMBERSHIP USE COUPON CODE: SPECIALDISCOUNT25 • BUY TWO GPL PRODUCTS AT JUST $6 USE COUPON CODE: BUY2 • GET 25% OFF ON 1 YEAR & LIFETIME MEMBERSHIP USE COUPON CODE: SPECIALDISCOUNT25 • BUY TWO GPL PRODUCTS AT JUST $6 USE COUPON CODE: BUY2 •

Reviews
There are no reviews yet